Tip: Start typing in the input box for immediate search results.
Using Spare Parts and Inventory Management
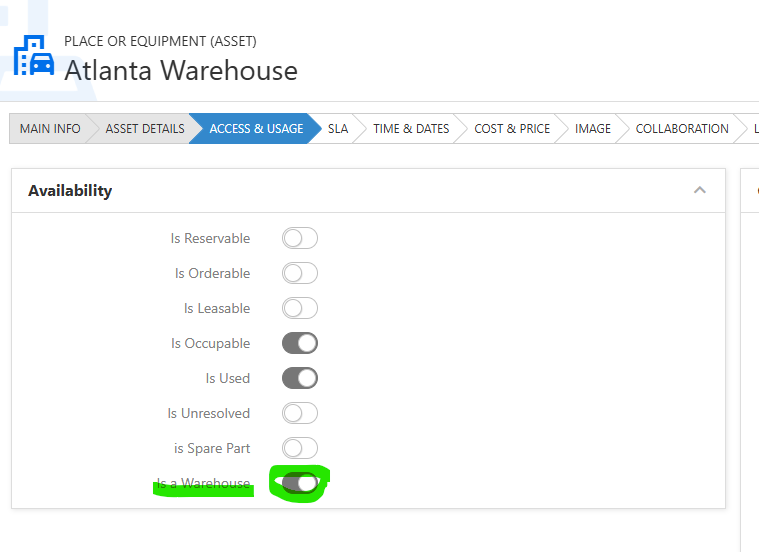
1. Setting up the Warehouses
Open an existing Asset or create a new one and set the asset as a Warehouse.
2. Using the parts Inventory
The Parts Inventory has 3 main pages.
- Parts Inventory
- Purchase Orders
- Spare Parts
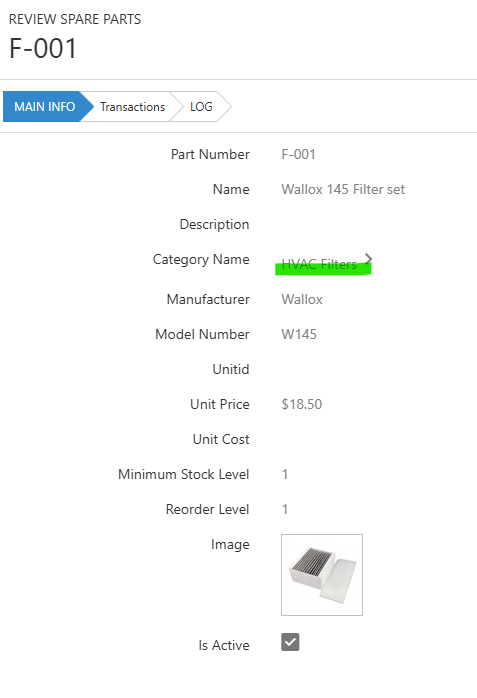
The first step is to insert a spare part in the Spare Parts list. Fill out the necessary fields. Create the Spare Part Categories as needed
3. Purchasing the parts
To have parts in inventory, parts must be purchased first. The Purchase Order process let you track the purchase process and store the historical costs and transactions.
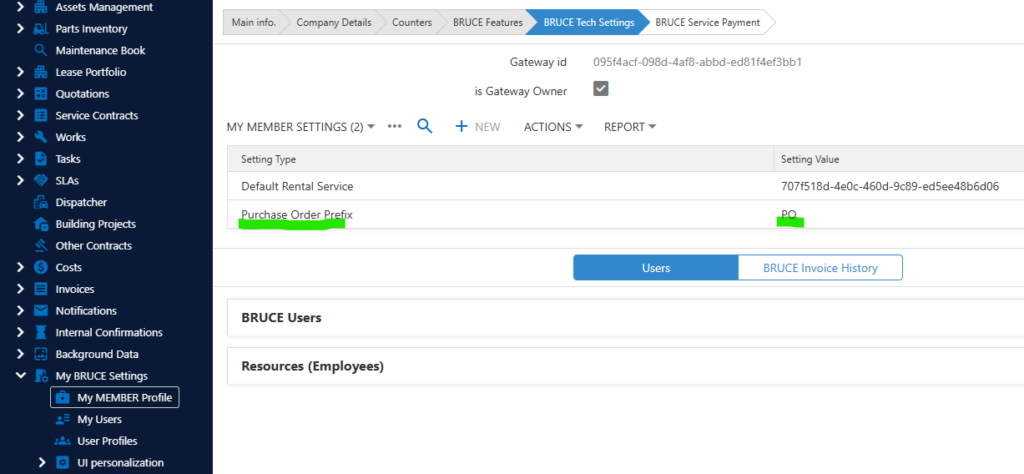
Note: the Purchase Order Number Prefix can be set to a member if needed. This option is for Admin. On the “My Member Settings“, insert the row as below.
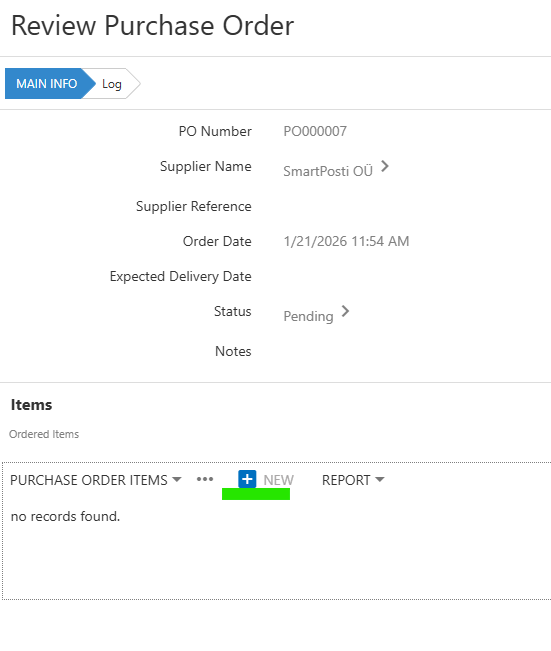
4. Create a PO.
Navigate to Purchase Orders in the Main menu under the parts Inventory

Save the PO, then the Parts can be added to the PO.
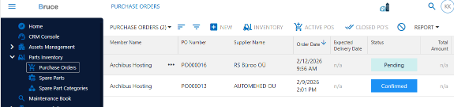
5. Purchase Orders List
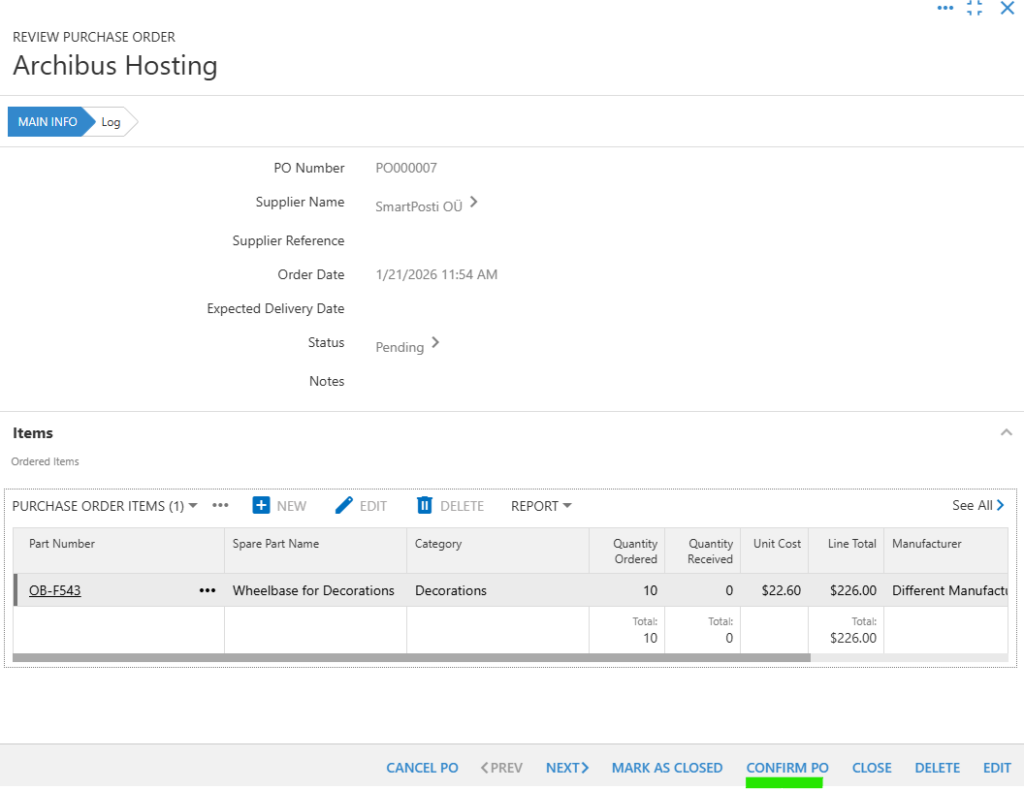
6. Confirming PO
To confirm the PO, first the supplier has to confirm the availability of the ordered quantities and prices. After confirming, the Inventory view shows the expected incoming items (the orderred quantity).

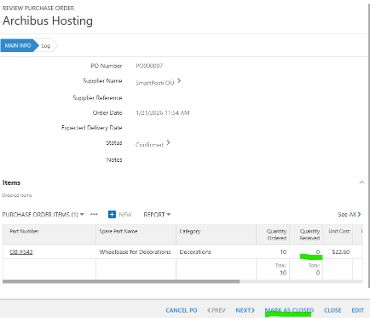
7. Receive Items
When the Stock Items are received at the warehouse, the PO must be marked as “Closed“
Before closing the PO, the received items quantity must be set to the correct value. If the user is not doing this, the dialogue will prompt the difference. The user can confirm that all items have been received by using the option.
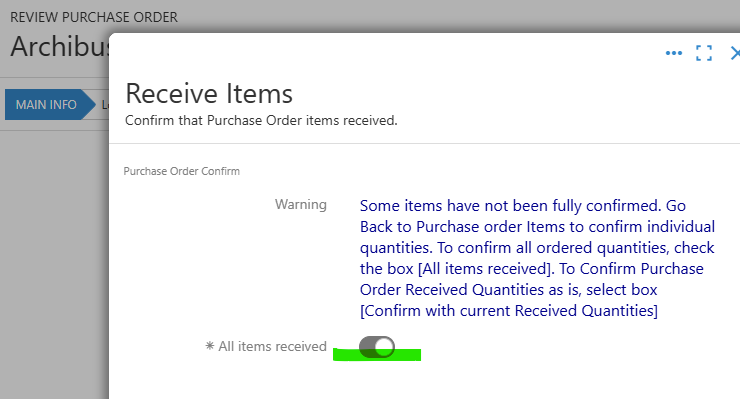
If the quantity ordered in the PO is received, the user can use the option “All Items received “. And click OK.
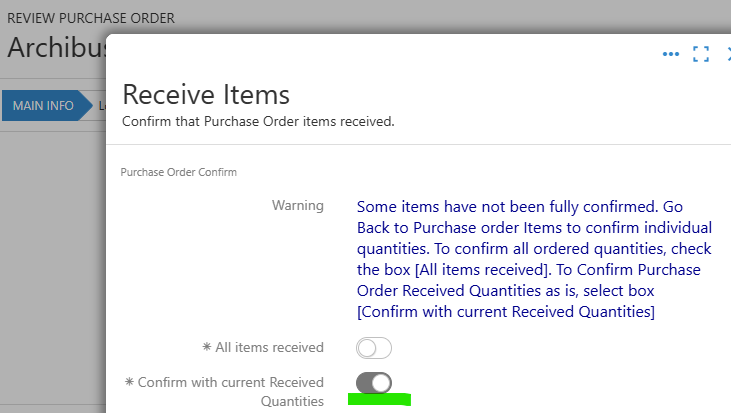
If the user needs to mark a different received quantity, press Cancel, adjust the Received Quantities in the PO, then click Mark PO as Closed again. The user can use the option to mark “Confirm Current Received Quantities “. In this case, the Inventory will be adjusted as it is in the PO even if received quantities differ from ordered quantities.
Inventory view after closing the PO.
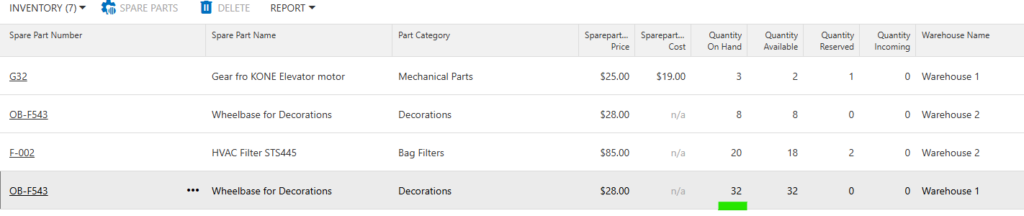
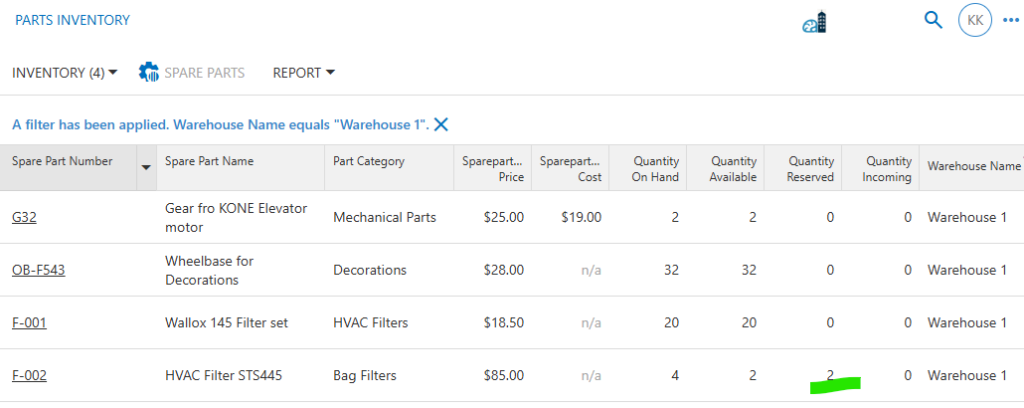
8. Inventory
The Inventory view shows the current quantities of the stock items (Spare parts) in the stock.
The stock is in general, but the Stock can be divided into multiple Warehouses (locations).
The Inventory view lists all existing items that have had some stock transactions. The stock transaction means adjustments of quantities, such as a purchase, reservation, use for work, or return to stock.
The Inventory view has 4 main Quantity values
Quantity Available – shows how many items can be reserved for work(s) currently
Quantity On Hand – shows how many items are in the warehouse, including the “reserved“ that are not collected jet.
Quantity Available – is the possible quantity to reserve or use
Quantity Incoming – shows the pending quantity that is ordered by PO-s but still not delivered.
9. Using the Spare Parts in ODW
Open the ODW form and navigate to “Subject Details “
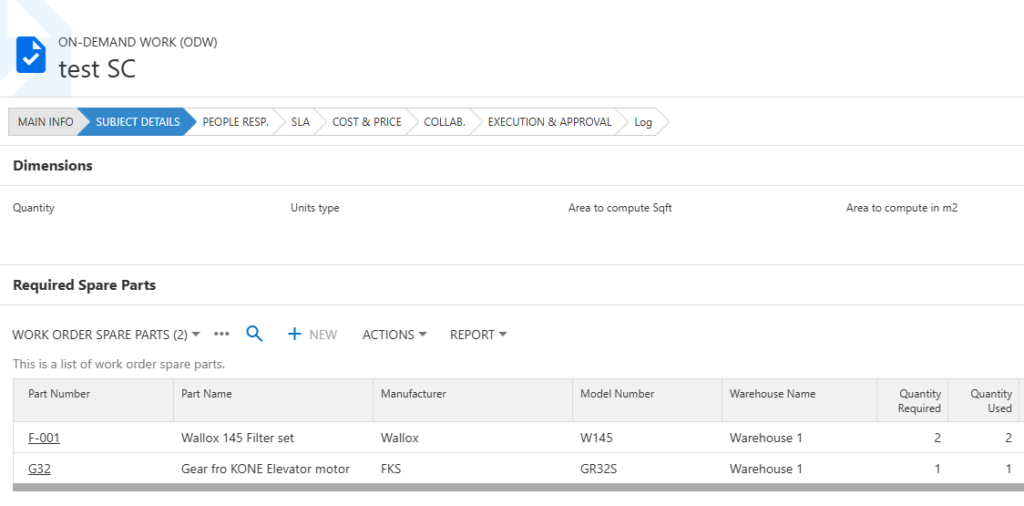
In the “Required Spare Parts“ Section, the spare parts can be added to the work request.
When adding the spare part, the Inventory shows the reserved amount of the spare part.
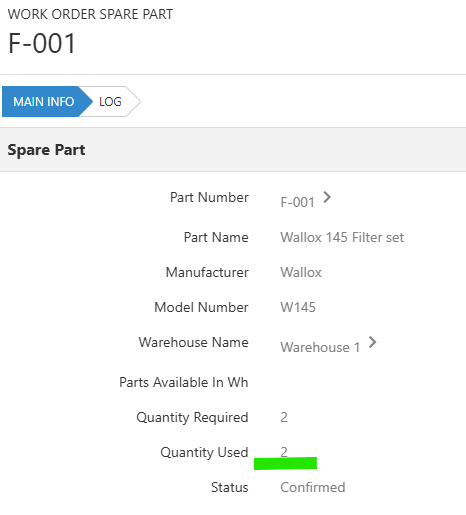
10. Confirm the used Spare-Parts for works
In ODW form, to assign the usage of the spare parts, open a spare part record and adjust the Quantity Used. After saving the form, the Inventory deducts the quantity from “Quantity on Hand“ (Units in Stock) and also from “Quantity Reserved “.
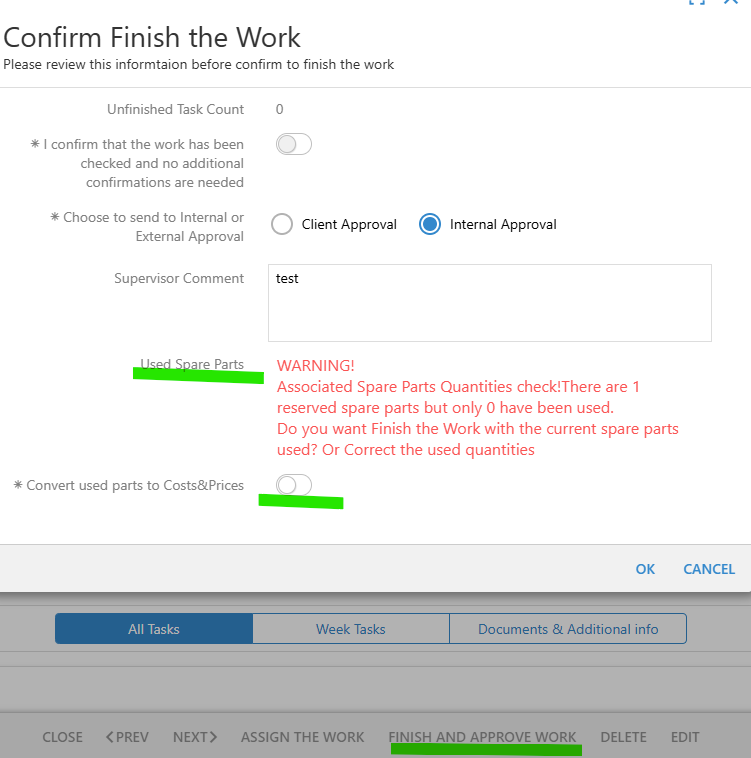
11. Releasing unused Spare parts
When the ODW is about to be marked as finished by the user, the unused spare parts will be automatically released from the status of Reserved in the Inventory.
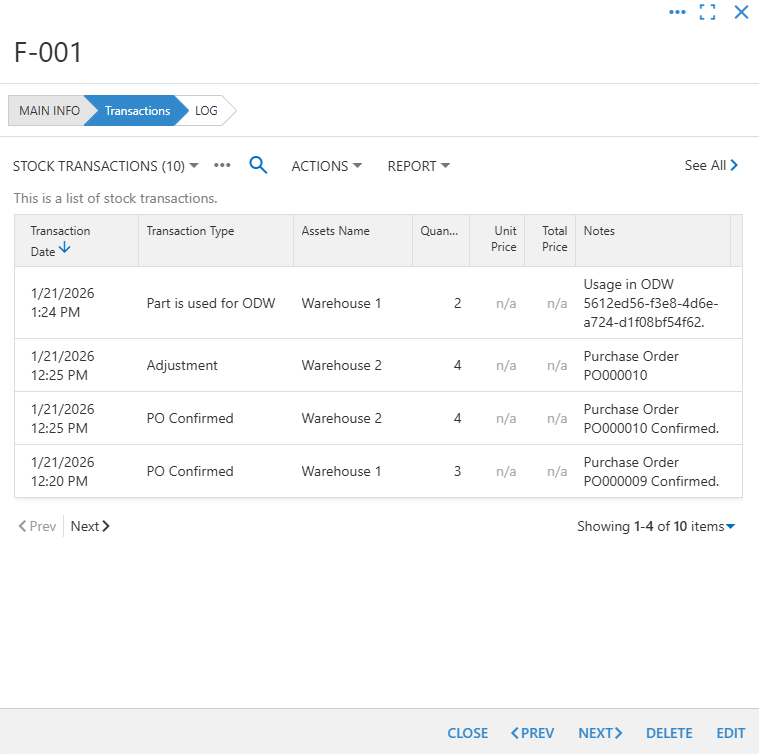
12. Transaction Log
All Inventory items have a Transaction Log to track the transactions with the Part and Warehouse.
To see transactions, open a Spare part and navigate to the Transactions Tab.
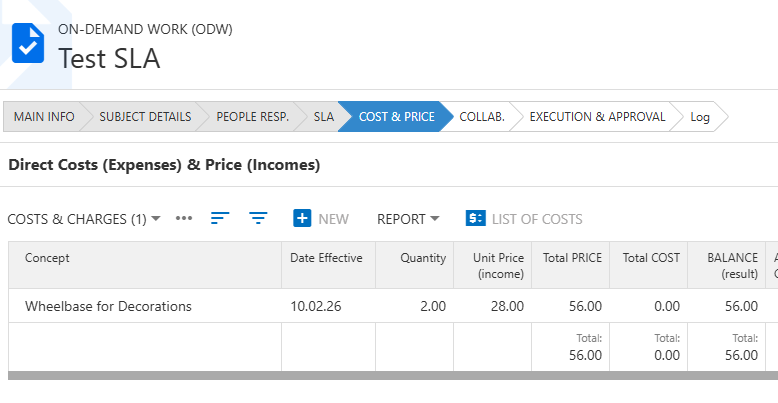
13. Creating Cost & Prices from Spare Parts.
To turn the used spare parts in ODW into Costs & Prices, two steps must be completed.
- Adjust the Quantity Used in ODW’s Spare Parts section if not done before.
- When the operator marks the work as Approved, it can select the option “Convert Used Parts to Costs & Prices “. If there is any spare part that can be converted into costs after the form is confirmed by pressing OK.
Costs created after confirming