Tip: Start typing in the input box for immediate search results.
1. Buildings & Equipment (Asset Initial Setup)
In BruceBEM, asset management covers both locations (such as buildings, facilities, and workspace) and equipment (machinery, tools, and devices) to ensure efficient tracking, maintenance, and utilization.
1.1 Asset registration and classification(site)
First, we will create a “Site” — which refers to a collection of buildings.
Next, we will add a “Building” to the site.
After that, we will add “Floors” to the building.
To create a “Site”, follow the steps below:
Step 1: Navigation
Background Data ->“Asset Management”

Step 2: Create new asset (Site)
In the next screen “Asset Management” click “New” to create a new asset

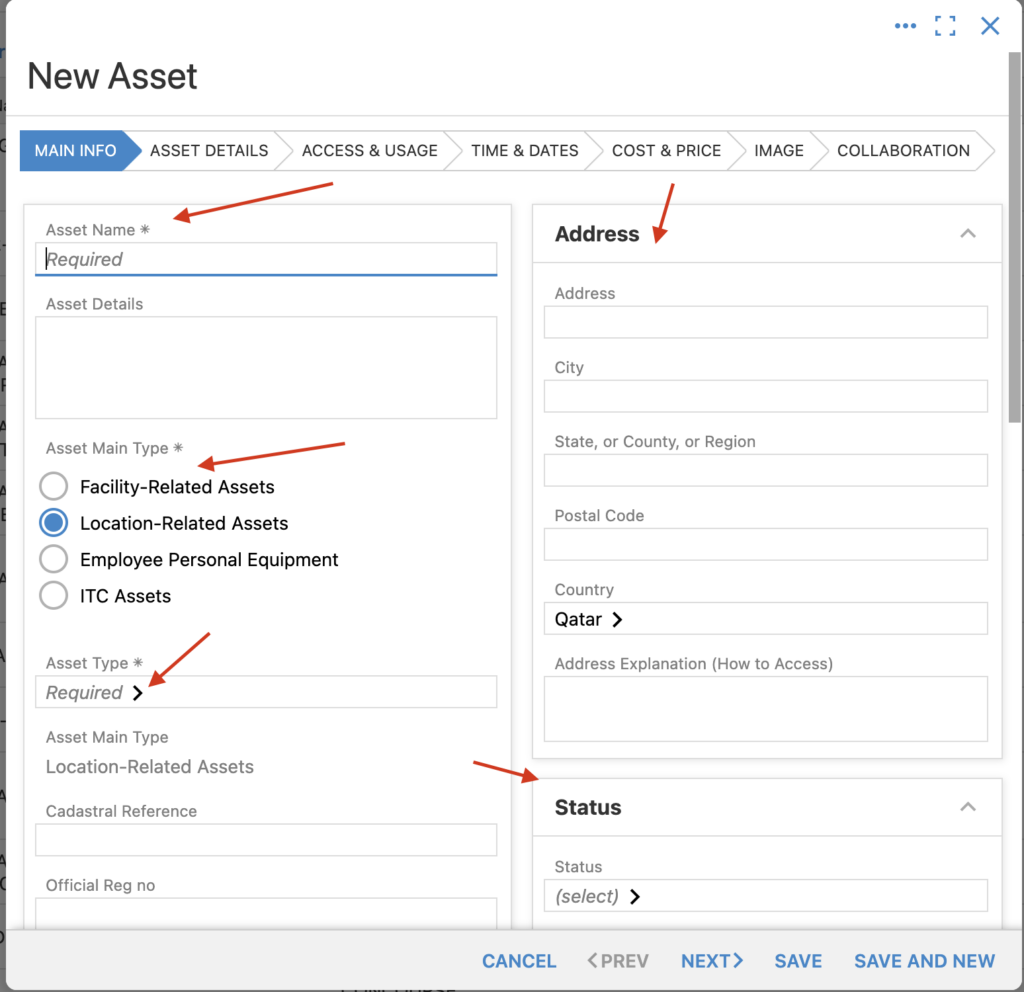
Step 3: Main info. New Asset detials
Provide all the asset details:
- Asset Name
- Address
- Status
Select the main asset type:
- Location-Related Asset (check the box)
Then, select the asset type:
- Site
You can also set up additional information:
- Warranty details
- Responsible business unit
- Department
Once all the details are entered, click “Next”.
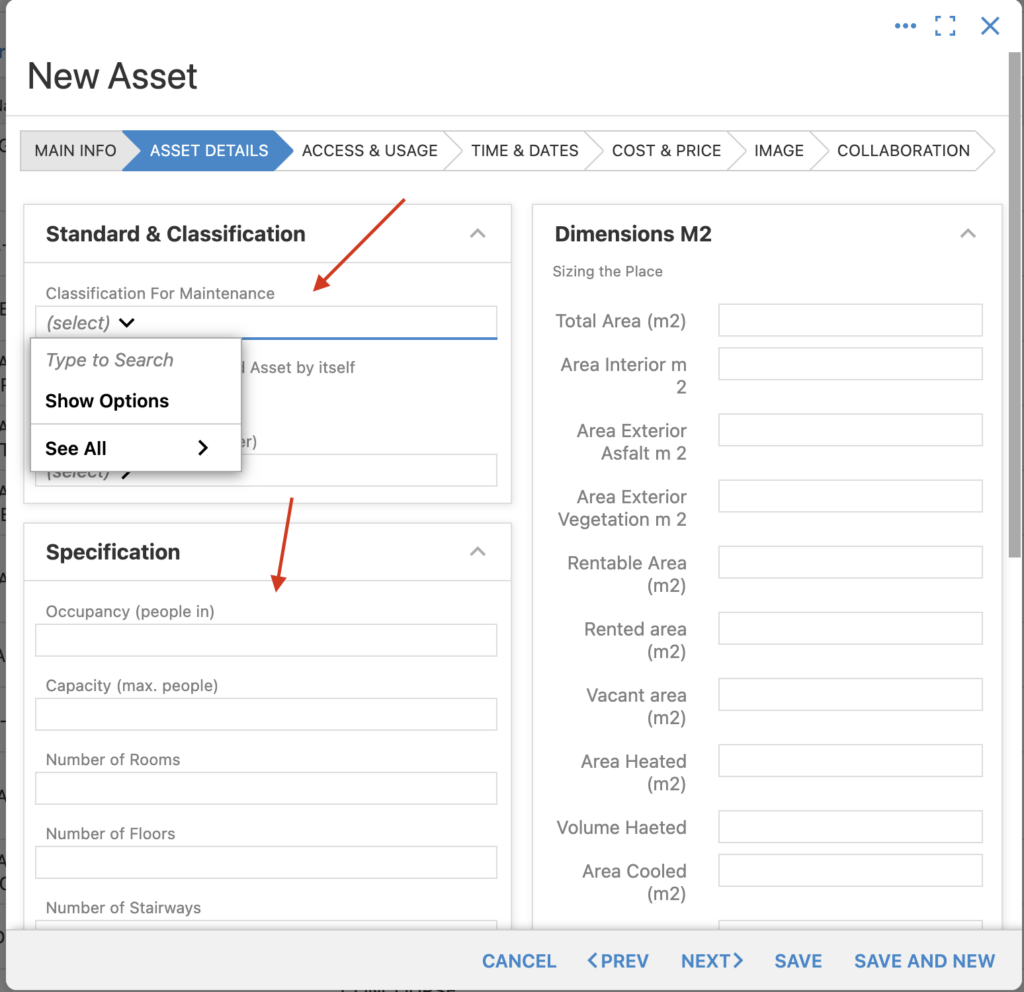
Step 4: Subject Details
In the next screen, add additional asset details:
- Standard and Classification
- Total Area
Once these details are filled in, proceed to the ”Next” step.
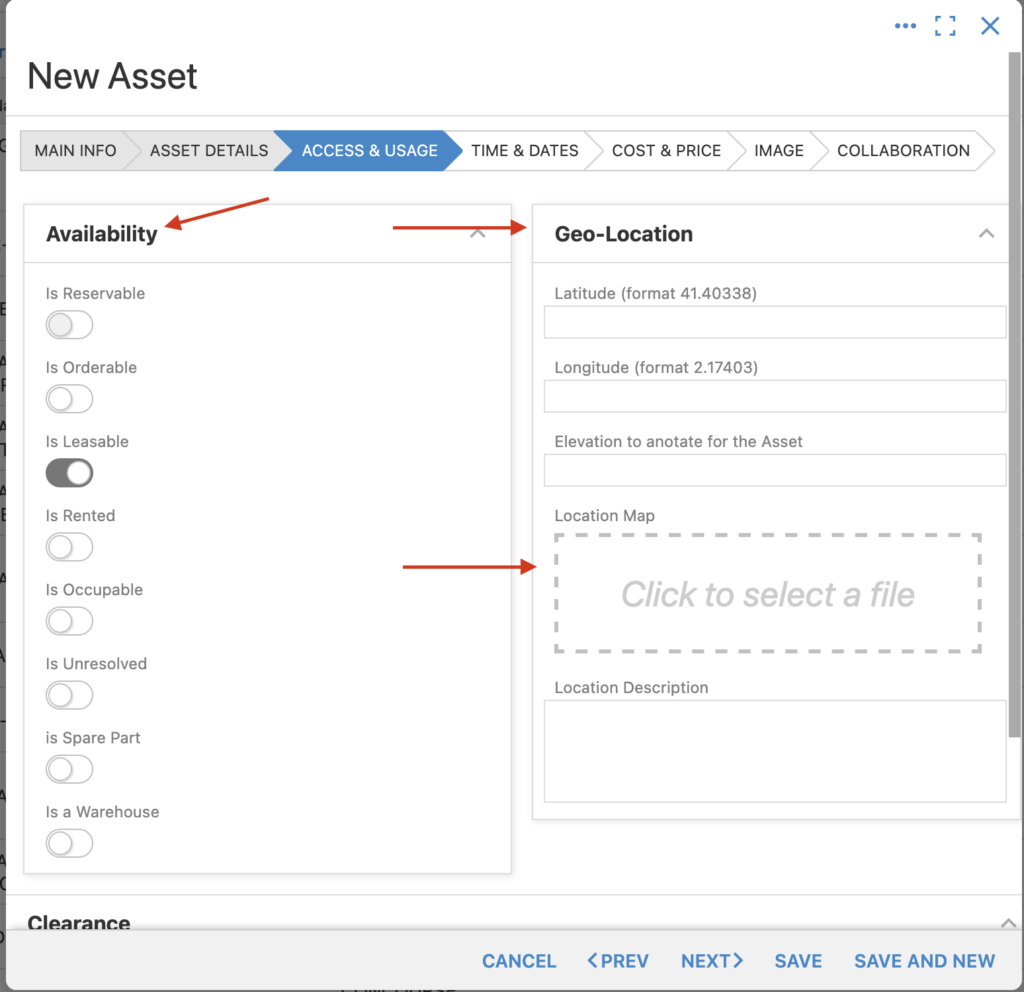
Step 5: Access & Usage
Update the asset details:
- Asset Availability: Set or update the current availability status.
- Location Description: Enter a detailed description of the location.
- Coordinates: Input the geographic coordinates for the asset’s location.
- Map: You can upload or insert an image of the map showing the asset’s location.
Once completed, proceed to the “Next” step.
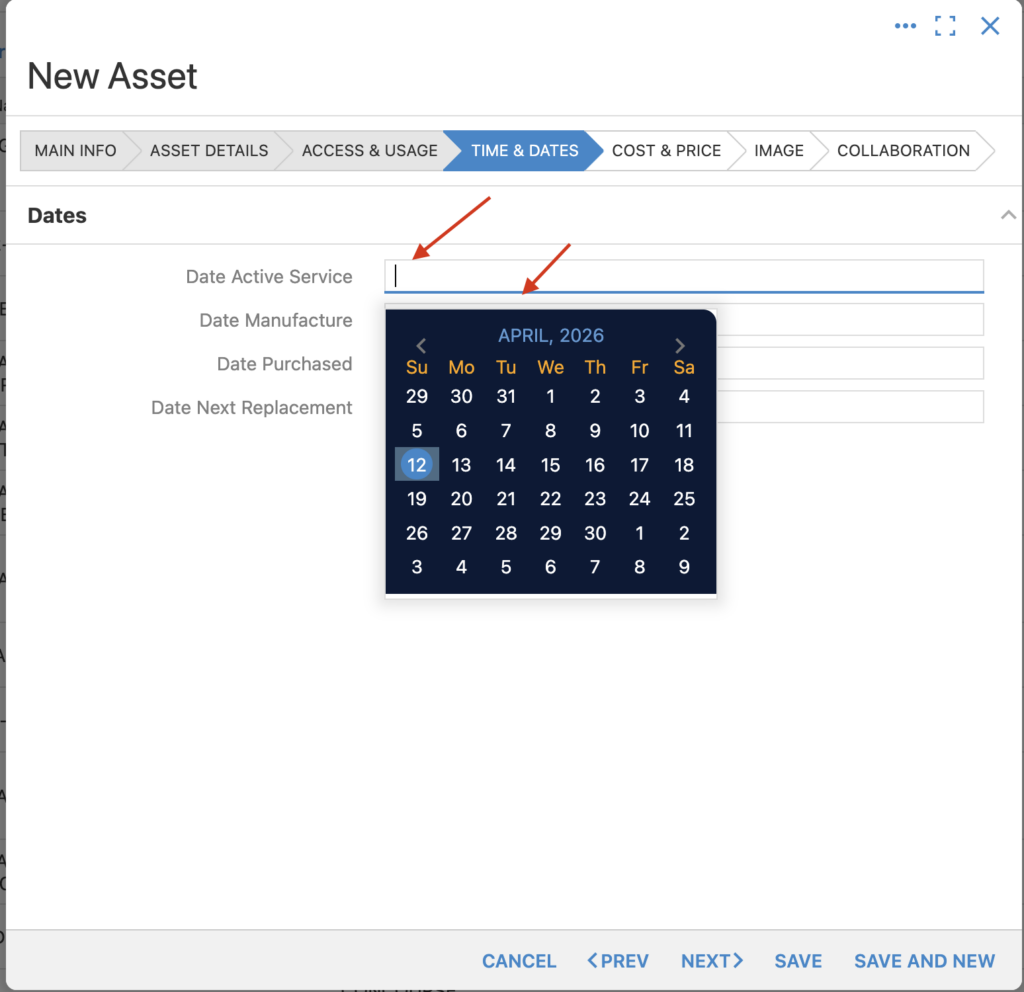
Step 6: Time and Dates
Add important asset dates:
- Date Active Service: Enter the date when the asset became operational.
- Date Manufactured : Enter the date when the asset was produced or manufactured.
Once these dates are entered, continue to the next step.
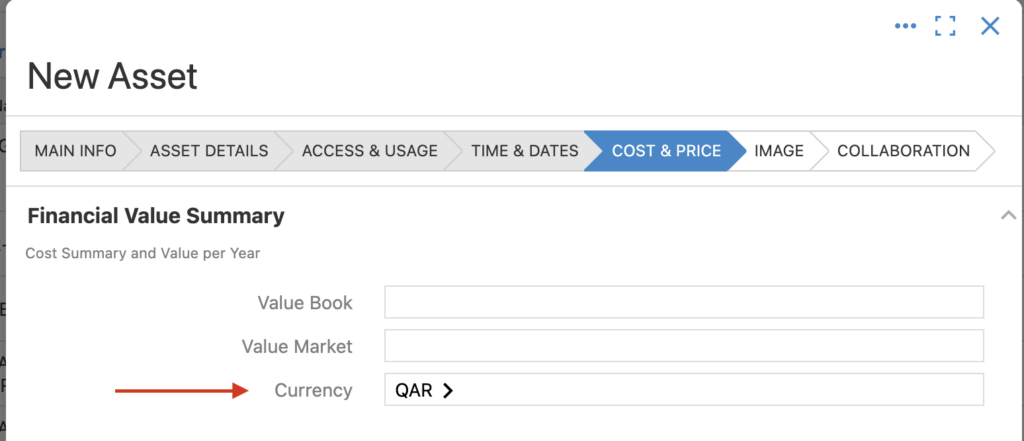
Step 7: Costing and Price
Select the currency to be associated with this asset
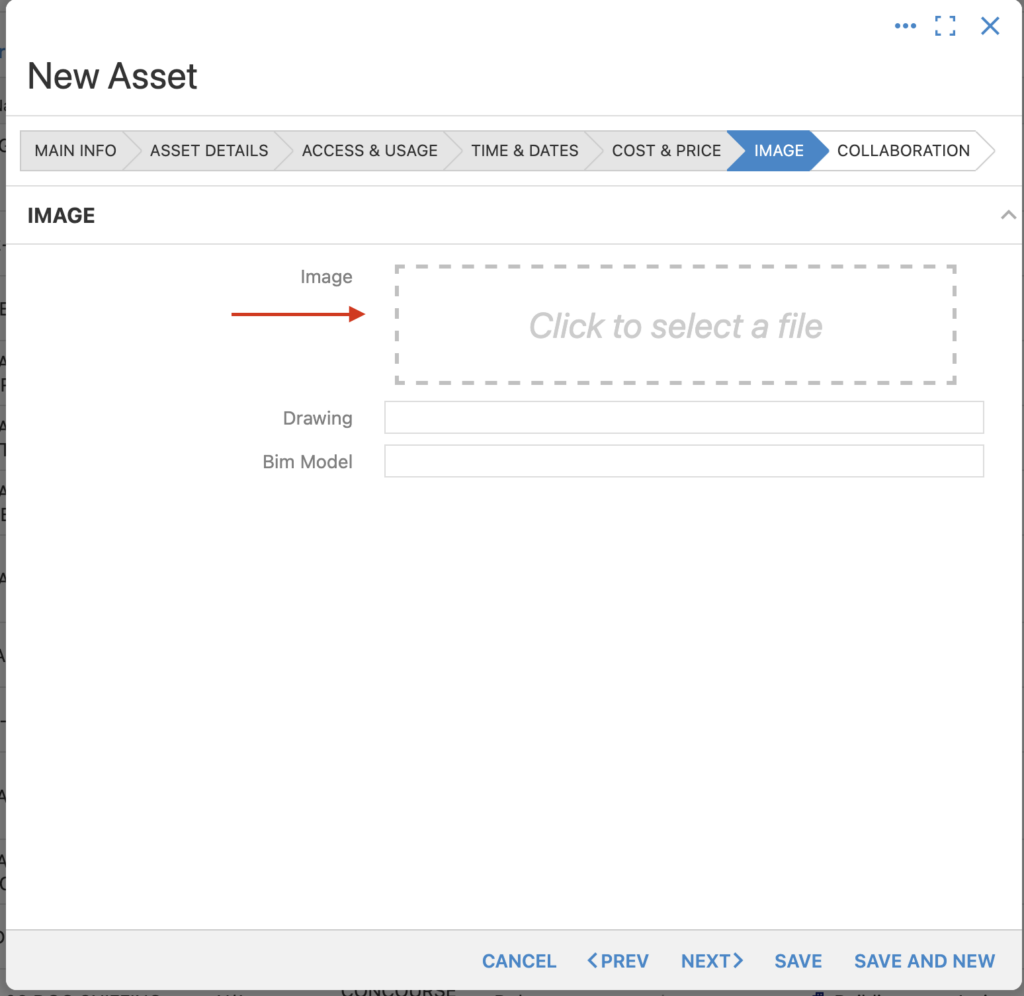
Step 8: Image and Drawing
Upload a picture for the asset
Step 9: Collaboration
Add the required information:
- Owner: Enter the name or details of the asset owner.
- Tenant: Enter the name or details of the current occupant of the location.
- Edit Permissions: Select who has the authority to edit this asset.
Click “Save” to create the new asset (site)
Note: Now we will add a building to that site
1.2 Asset registration and classification(Building)
To create a “Building”, for the site follow the steps below:
Step 1: Navigation
Background Data -> “Asset Management”

Step 2: Selection
In the “Asset Management” screen, use the filter to select “Site.”
Choose the site you created earlier from the list.

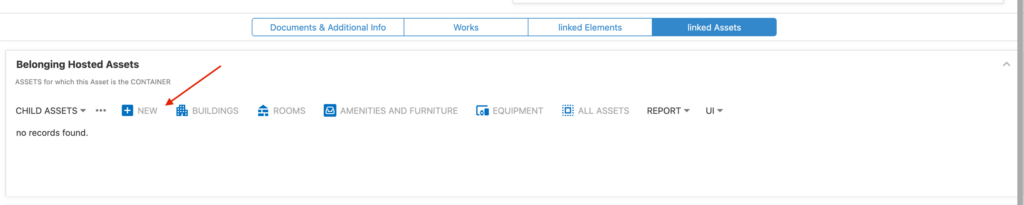
Step 3:Create new asset (add a linked asset – Building)
In the “Places or Equipment (Asset)” screen:
- Scroll down and click “Link Asset”.
- Then click “New” to create a new child asset (e.g., Building for the site).
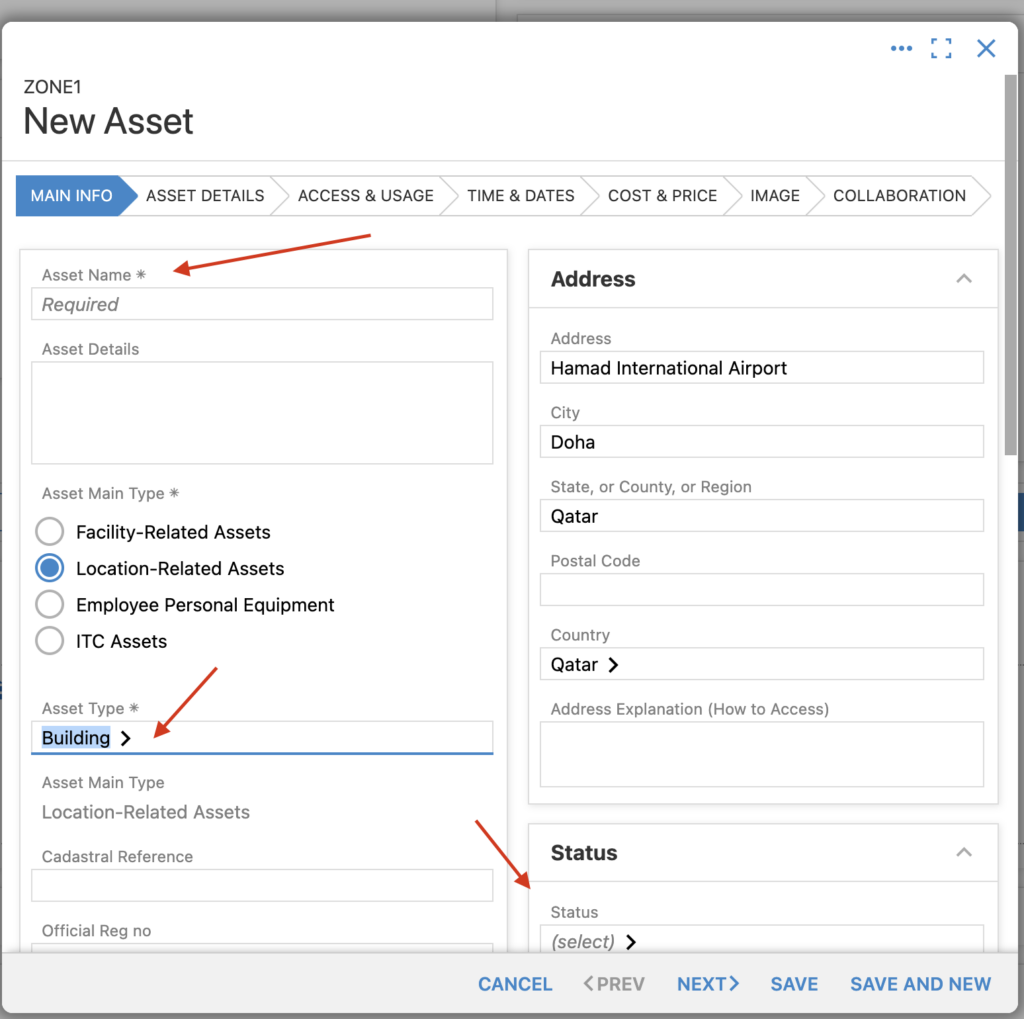
Step 4: Main info. New linked Asset detial
A new pop-up titled “New Asset” will appear.
- Enter all the necessary information to create the new asset (e.g., Building).
Note: Now, you have successfully added a building to the site you previously created.
Next step: You can proceed to add a floor to the building you have just created.
1.3 Asset registration and classification(Floor)
Step 1: Navigation
Background Data -> “Asset Management”

Step 2: Selection
In the “Asset Management” screen:
- Use the filter to display Buildings.
- Select the building that was created in the previous steps.

Step 3:Create new asset (add a linked asset – Building)
In the “Places or Equipment (Asset)” screen:
- Scroll down and click “Link Asset.”
- Then click “New” to create a new child asset (e.g., Floor for the building).

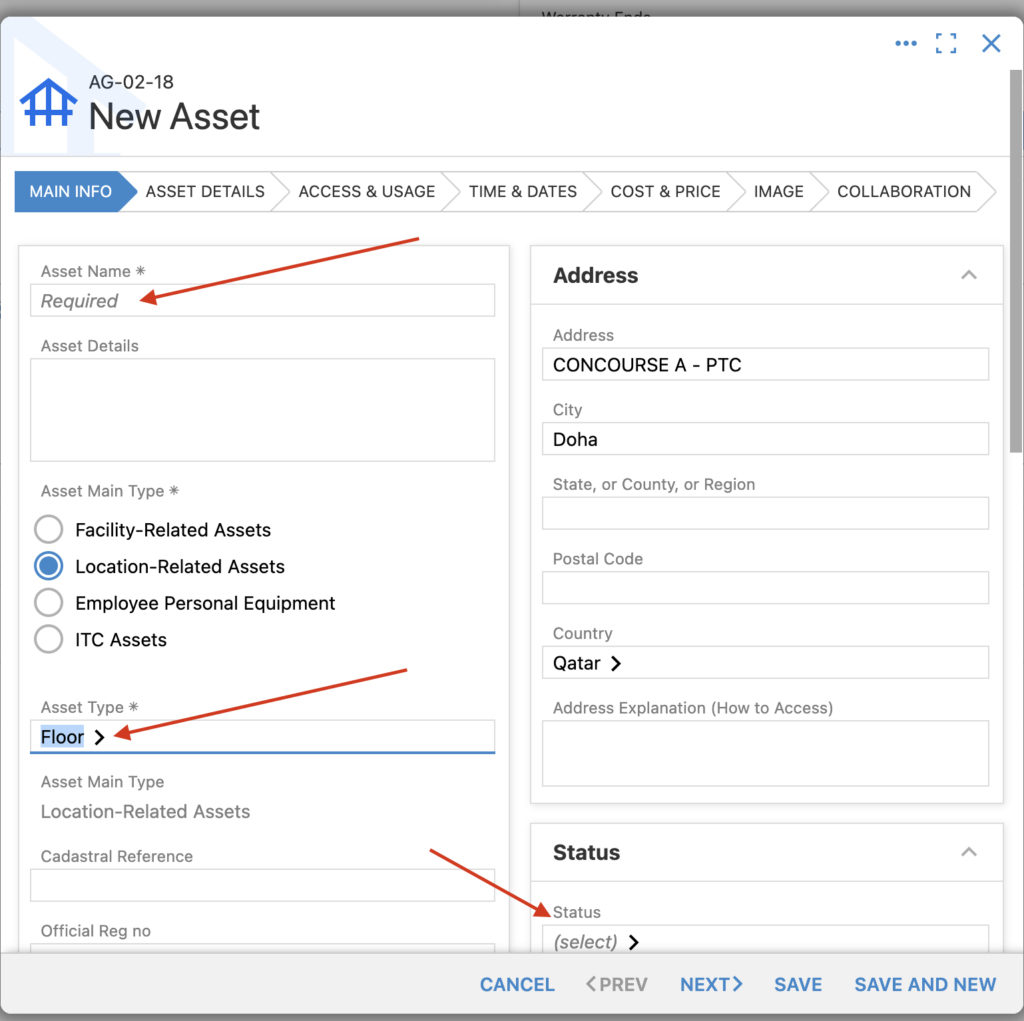
Step 4: Main info. New linked Asset details
A new pop-up titled “New Asset” will appear.
- Enter all the necessary information to create the new asset (e.g., Floor).
Note: Now, you have successfully added a floor to the building you previously created
Key Features of Asset Management in BruceBEM:
- Asset Registration & Classification:
- Users can register assets, categorize them (e.g., fixed or movable), and assign unique identification codes.
- Assets can be linked to specific places or work teams for better organization.
- Ownership & Partnership Management:
- Assets can be assigned to specific partners or subcontractors based on Bruce Smart Contracts, ensuring authorized access and usage.
- The system ensures that only verified partners can manage, maintain, or modify asset details.
- Preventive & Corrective Maintenance:
- Scheduled preventive maintenance (PM) tasks help reduce downtime and extend asset lifespan.
- Users can log corrective maintenance requests to address unexpected failures or malfunctions.
- Cost Tracking & Budgeting:
- Asset-related costs, including maintenance, repairs, and depreciation, can be tracked.
- Budgeting tools help forecast expenses and optimize resource allocation.
- Work Order & Assignment Integration:
- Assets can be linked to specific work orders, ensuring that the right teams handle maintenance and operations.
- Real-time updates allow better coordination between managers, subcontractors, and work teams.
- Performance Monitoring & Reporting:
- Users can generate reports on asset performance, usage trends, and maintenance history.
- Data-driven insights help improve decision-making and operational efficiency.
By integrating places and equipment under a structured asset management system, BruceBEM enhances control, optimizes maintenance workflows, and improves overall productivity.